In my last articles, I‘ve been talking a lot about current events. This week I want to talk about a technical topic again: I am running the V12 Zero Downtime Upgrades (ZDU) on a test system and report on my experiences.
Refer to the Automic documentation for instructions on how to do this. The online help is sometimes slow, if this is the case, simply use the documentation in the downloaded package.
Automic recommends upgrading via ZDU. But I warn you in advance: The ZDU is a little more effort than a conventional upgrade. But there is no application downtime.
What You Should Know About the Zero Downtime Upgrade
There are two different modes that are active during the ZDU:
- Compatibility Mode:
From the start of the upgrade to the end. The performance of the system is noticeably reduced (approximately 1/3 reduced, the system retains about 2/3 of the performance). - Parallel Mode:
Towards the end of the ZDU. In this mode, WPs of the old and new versions run in parallel.
For the implementation of the ZDU, Automic describes several possible procedures.
- Halving the existing system:
The existing system is split in halves, the disabled half is upgraded, followed by the second half. - Distributed installation:
The existing installation is doubled. This requires much more preparation, since, for example, the number of ports must be doubled, which may require new firewall settings. - Using the Automic Proxy:
This is the stress-free variant, because you can bundle the connections on the proxies.
I selected the “Halved Environment” method for my test to upgrade a very early V12 to the latest V12. So I did not perform a system upgrade, I just applied a hotfix.
Preparing the Zero Downtime Upgrade
1. Download the desired target version from downloads.automic.com
2. Upgrade the AWI to the latest version
Of course, I first make a backup of the old version. I do not want to upgrade the Tomcat Application Server because my version 7.0.70 is still compatible. You can check the compatibility of components with the Automic Compatibility Checker.
3. Upgrade the utilities
First I create a backup of Utility/bin and Utility/db, after which I install the new utilities into the bin directory.
Then the configuration files have to be adapted. As I only install a hotfix, I copy the configuration files of the old utilities.
Finally, I copy the directory db.
4. Parallel installation of the AE of the target version
I chose the method “halved environment”, so I have to install the new version in parallel to the old one. I install it in the folder bin_target, for the upgrade of a real system you should of course choose a better name.
I copy the file ucsrv.ini from the old version, so it is identical for all processes. Do not forget to copy the appropriate JDBC driver for the JWP to the subdirectory lib!
5. Assign the privilege “Execute System Upgrades” to a user on client 0000
6. Backup the database
You can do this later on, preferably immediately before loading the initial data.
Tension is Rising: The Upgrade is Starting
I will describe step by step how I proceeded. The numbering of my steps does not correspond to the numbering in the AWI.
As my AWI was set to German, almost all screenshots in this english article are taken from the Automic Documentation.
1. Logging in as user with appropriate authorization on client 0000
2. Starting the wizard
To do this, in the Administration view select “Automation Engine Management”, then “System Upgrade”, and then click “Run System Upgrade Wizard”.
The system now switches to Compatibility Mode!
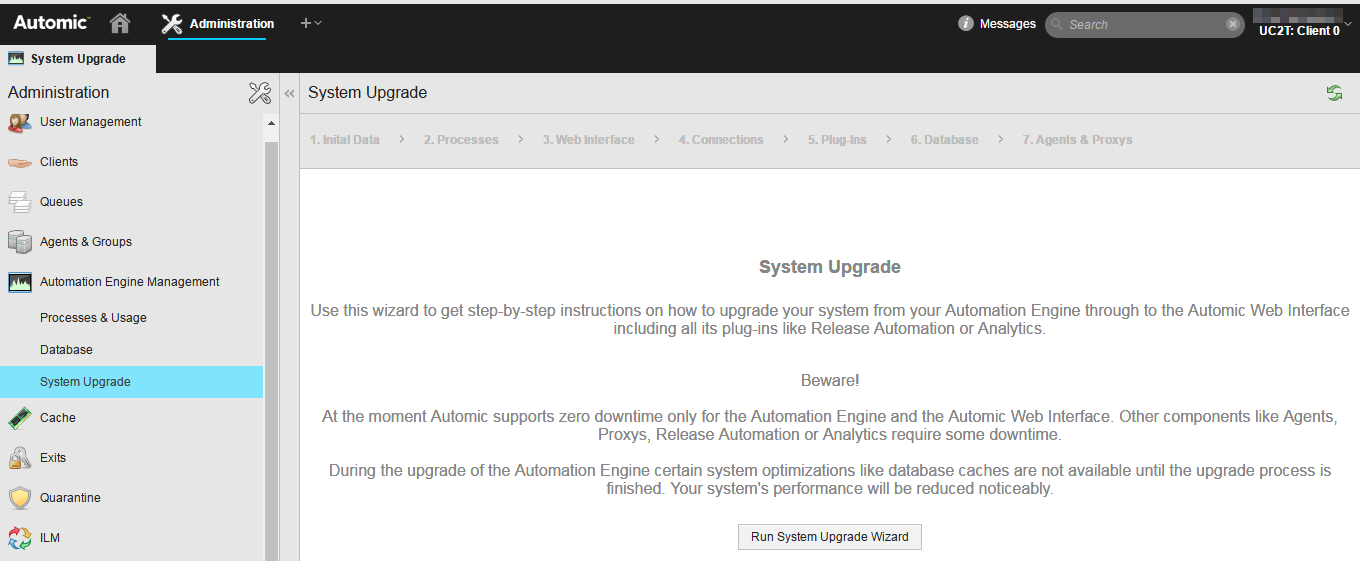
Wizard step 1: Let’s get started! (Screenshot is from the Automic Documentation)
3. Loading new initial data
Next, I load the new initial data using DB Load Utility. It is a strange feeling to perform the DB load of initial data on a running system.
But everything works perfectly, only the duration is conspicuously long. On my very small playground system it takes more than 1.5 hours. This is not a representative value, though, because my system runs on rather weak hardware.
4. Checking the initial data
The next step is to check the initial data and start the processes on the target version.
5. Changing processes
With my “halved environment” method, I first have to stop half of the processes and change them within the service manager so that they are started from the directory with the new binaries (of the target version).
Then I start the processes with the new binaries via the service manager.
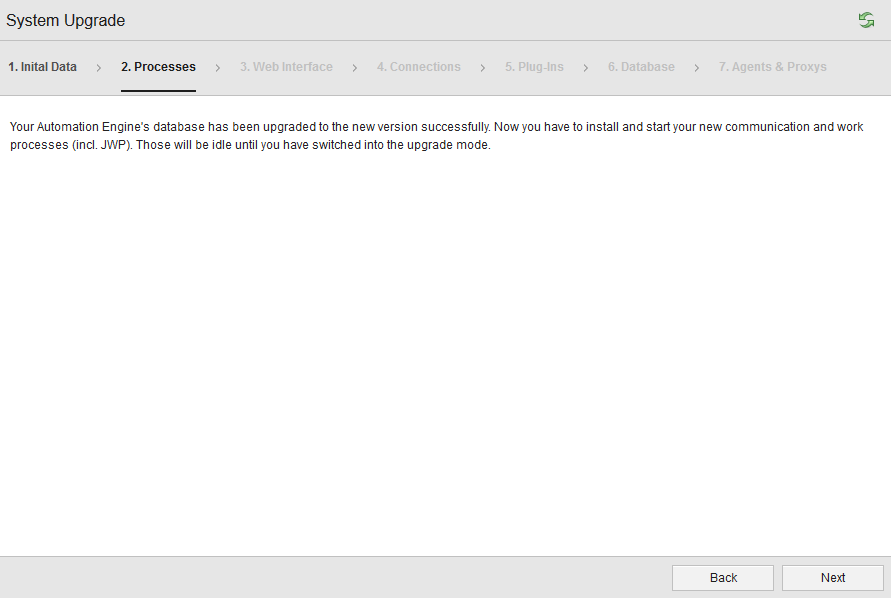
Wizard step 2: I change half of the processes to the new binaries. (Screenshot is from the Automic Documentation)
6. Upgrade of the AWI
At this point, the wizard checks whether the processes of the target version are running. The wizard also calls for the AWI to be upgraded. I have already done this in the preparatory phase.
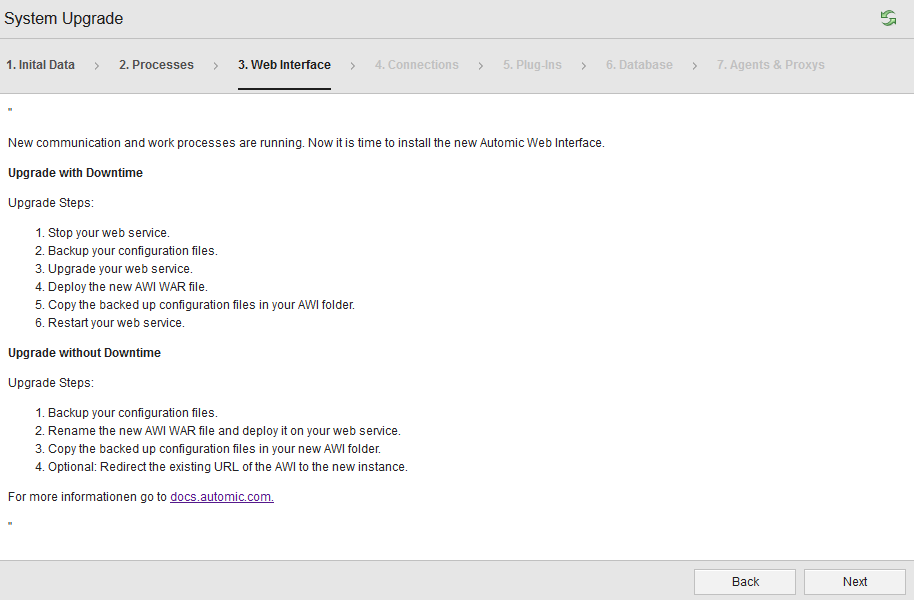
Wizard step 3: Ha, I’ve already done that. (Screenshot is from the Automic Documentation)
7. Parallel mode is activated
The system now runs in parallel mode.
Here I notice an interesting error in the AWI: The messages about the connection list are not yet localized on client 0, so in my German AWI session only the message numbers are displayed.
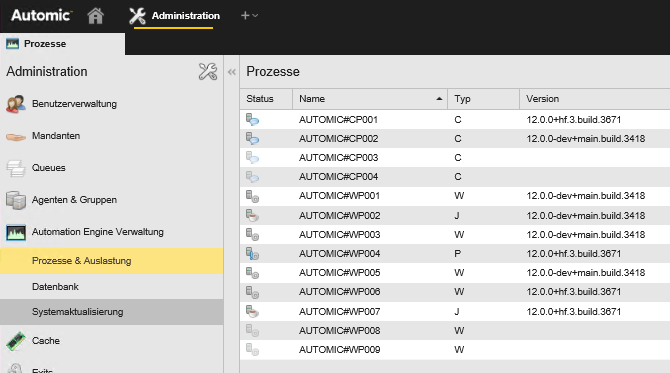
My list of processes (sorry, this screenshot is in German): Processes of both versions are active.
Wizard step 4: This screenshot is from the documentation. In my system, the list was not empty.
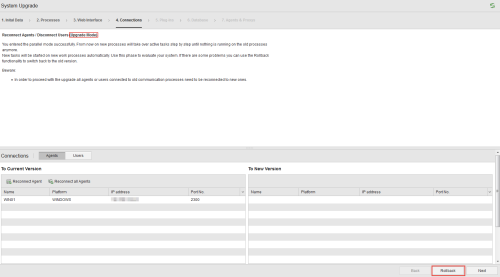
8. Reconnecting agents
All agents must be connected to a CP with the new version. On my uncritical playground system, I just click on “Reconnect all agents”.
9. Plugins to update
The Wizard now shows a list of all plugins to update. I only need to update the AWI plugins.
My Analytics backend and datastore do not require upgrades, because with md5sum, I find that the new Analytics files are identical to those in my system.
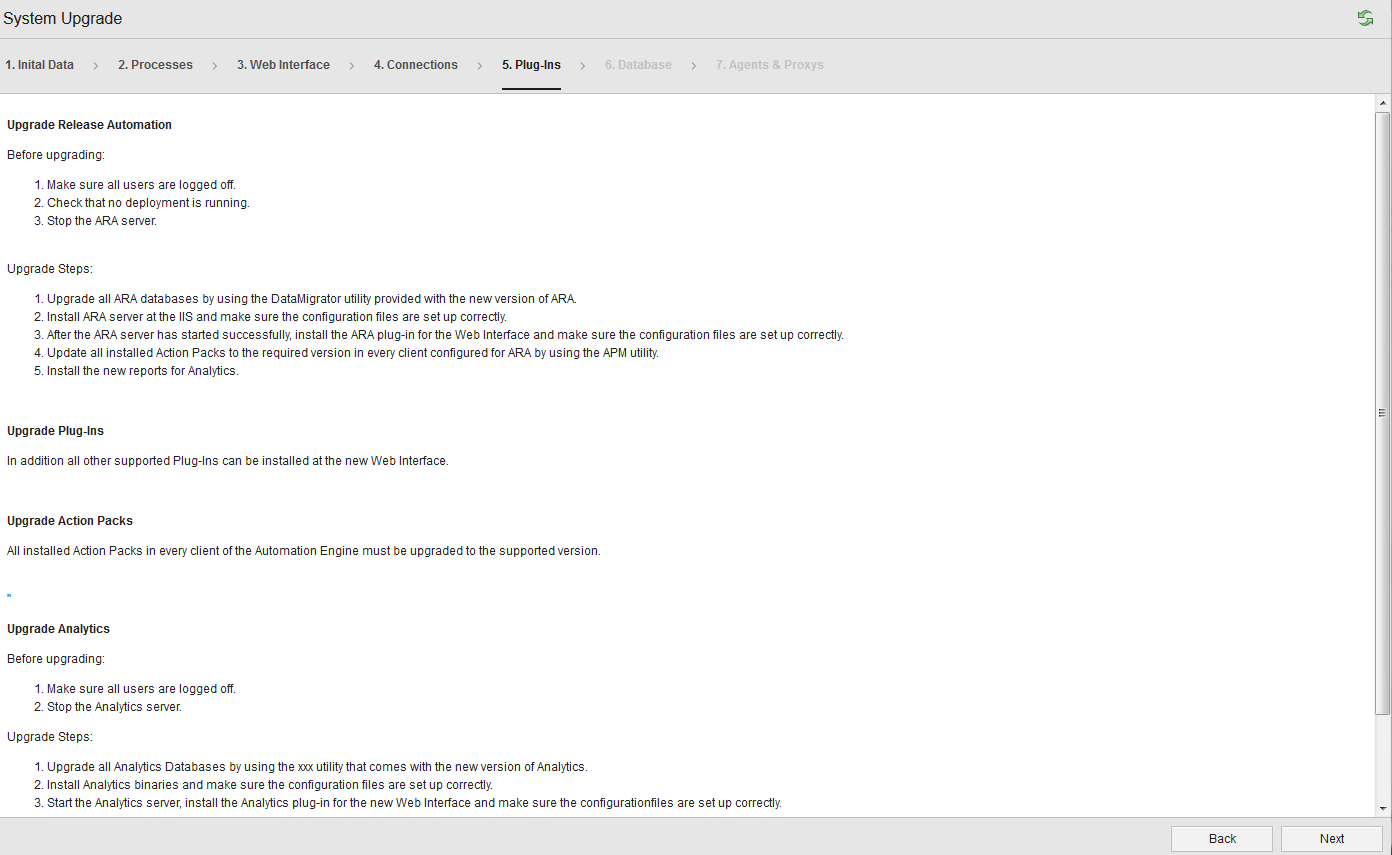
Wizard step 5: In a real upgrade, all plugins und Action Packs have to be updated.
10. Updating the AWI plugin
I am using the AWI Plugins Analytics (for the AWI Dashboard), Actions Builder (for building actions), and Plugin Manager (for managing packs) in my system.
I did not install these plugins during the update of the AWI, so I have to do it now. The appropriate versions are in the downloaded packages:
- The Analytics plugin in the Automation.Platform\Analytics\ui-plugin folder
- The ActionBuilder in the Tools\Action.Builder folder
- The Plugin Manager in the Tools\Plugin.Manager folder
I copy the plugins (one JAR file each) into the Tomcat subdirectory webapps\awi\WEB-INF\autoinstall.
In the file plugin.properties (in the directory webapps\awi\config\webui-plugin-analytics) I have to enter the API key, but I have to restart Tomcat so that the connection to the Analytics backend will work!
With my playground system, this is no problem. On a larger productive system, you can avoid having to restart Tomcat by modifying the plugin.properties in the JAR file of the Analytics plugin.
After the restart of Tomcat, the Analytics Dashboards work as expected.
11. Other updates
With this hotfix, I do not have to update anything else. With a real upgrade, additional things have to be updated, for example various action packs.
12. Deleting memory entries in the DB that point to old version
The wizard now displays a list of memory entries that still point to the old version. In my case, luckily, the list is empty.
Neither the wizard, nor the documentation explain what exactly you have to do with memory entries that still point to the old version. I do not assume that you can simply delete them.
I would advise you to contact support if you see entries after a few days.
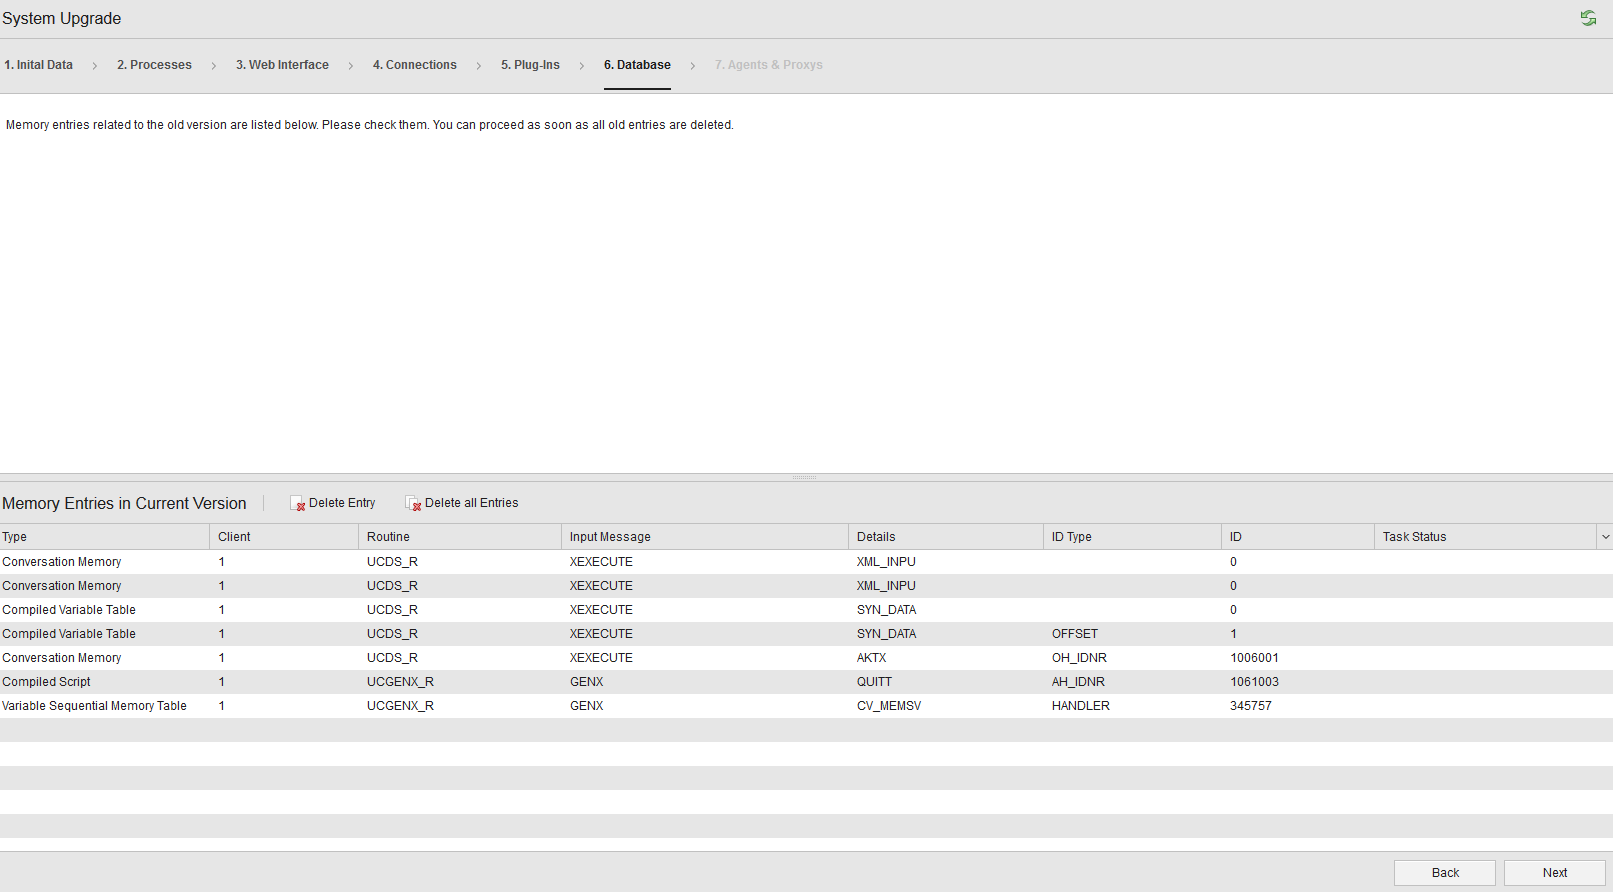
Wizard step 6: Ok, what do they want me to do here?
13. Upgrade agents using CAU
I forgo this step, as I will take a more detailed look at the Central Agents Upgrade at another time. Now I click on “next” instead.
The ZDU is now completed.
In this last step, all processes with the old version were stopped in the background. So I need to change the other processes in my service manager to the directory where the new version is located and then start them.
Upgrading the service manager
The service manager has not yet been updated. This can be done in the course of the ZDU by starting the processes of the target version with a new separate installation of the service manager. You should upgrade your service manager in two cases:
- Problems in your version of the service manager have been fixed in the new version.
- You perform a real upgrade (not just a hotfix).
Conclusion for the Zero Downtime Upgrade
In general, I really find the ZDU a great function! System updates without Downtime – genius!
Also, I like the implementation in the form of the wizard! It is easy to use and tries to make sure you do not forget anything.
But do not take the ZDU lightly because of the simple wizard! Remember what I wrote at the beginning: The ZDU is at least as much work as a conventional upgrade – only with a different process.
In some places I still see room for improvement:
- The wizard’s translation to German is not yet complete.
- Tomcat must be restarted after manually reinstalling the Analytics UI plugin.
- The documentation of the ZDU doesn’t say anything about the service manager, although most customers use it.
- It is not clarified what has to be done in step 12 (in the wizard: step 6) with the memory entries in the DB.
My playground system ran on one box, without much load, without users and with 4 agents. I was able to upgrade this system without problems, but this is by no means a model for a real system upgrade! Also, the experiences I mentioned and suggestions for improvement do not claim to be complete!
Have you already carried out a ZDU? What is your experience with the ZDU?